Friday, May 16, 2014

Making Laundry Soap from Recycled Olive Oil (Castile Soap)

Bins for used oil are placed throughout town in order to stop people from pouring used oil down the drain or in the trash.  However, when the used oil is olive oil, it´s only more incentive for me to recycle it myself into laundry soap.  Olive oil is not just more expensive but the soap made from it would have a longer shelf life as compared to sunflower oil.  I decided to show a few friends how simple it can be done and hopefully get them to recycle oil in their home and save money on laundry soap as an extra benefit.  I hope this blog post reaches others interested in recycling their used oil into something as useful as laundry soap.


In order to make the soap appropriate for laundry, I didn´t want any leftover oil to hinder it´s cleansing potential in clothes.  So, I calculated (soapcalc link on the sidebar) the recipe for 0% superfat and reduced the water percentage to 20% because I plan on using liquid fabric softener as the fragrance.  At first I calculated the recipe for 1 liter (1000 gr.) of oil and then I readjust the quantity accordingly.  The final recipe is as follows:

4000 gr. olive oil
  800 gr. tap water
  544 gr. lye granules (NaOH)
  380 gr. rose-scented fabric softener


Note: I had rounded up the lye amount per liter of oil to 136 gr.  That´s how I arrived at 544 gr. lye in the recipe (136 x 4).  I don´t think this would affect the final laundry soap result.  When pouring the lye water into the oil, there is always some lye water that stays behind with the container and doesn´t get to the oil, the couple of extra grams of lye is actually a good thing when making laundry soap.


The oil, which has been previously strained to remove solid bits of food particles, is at room temperature and in the black bucket while the lye is being mixed in with the tap water in the blue bucket.  Once the lye is dissolved, carefully add it to the oil.  The lye water is hot, so handle with care and wear gloves to protect against any splashing.


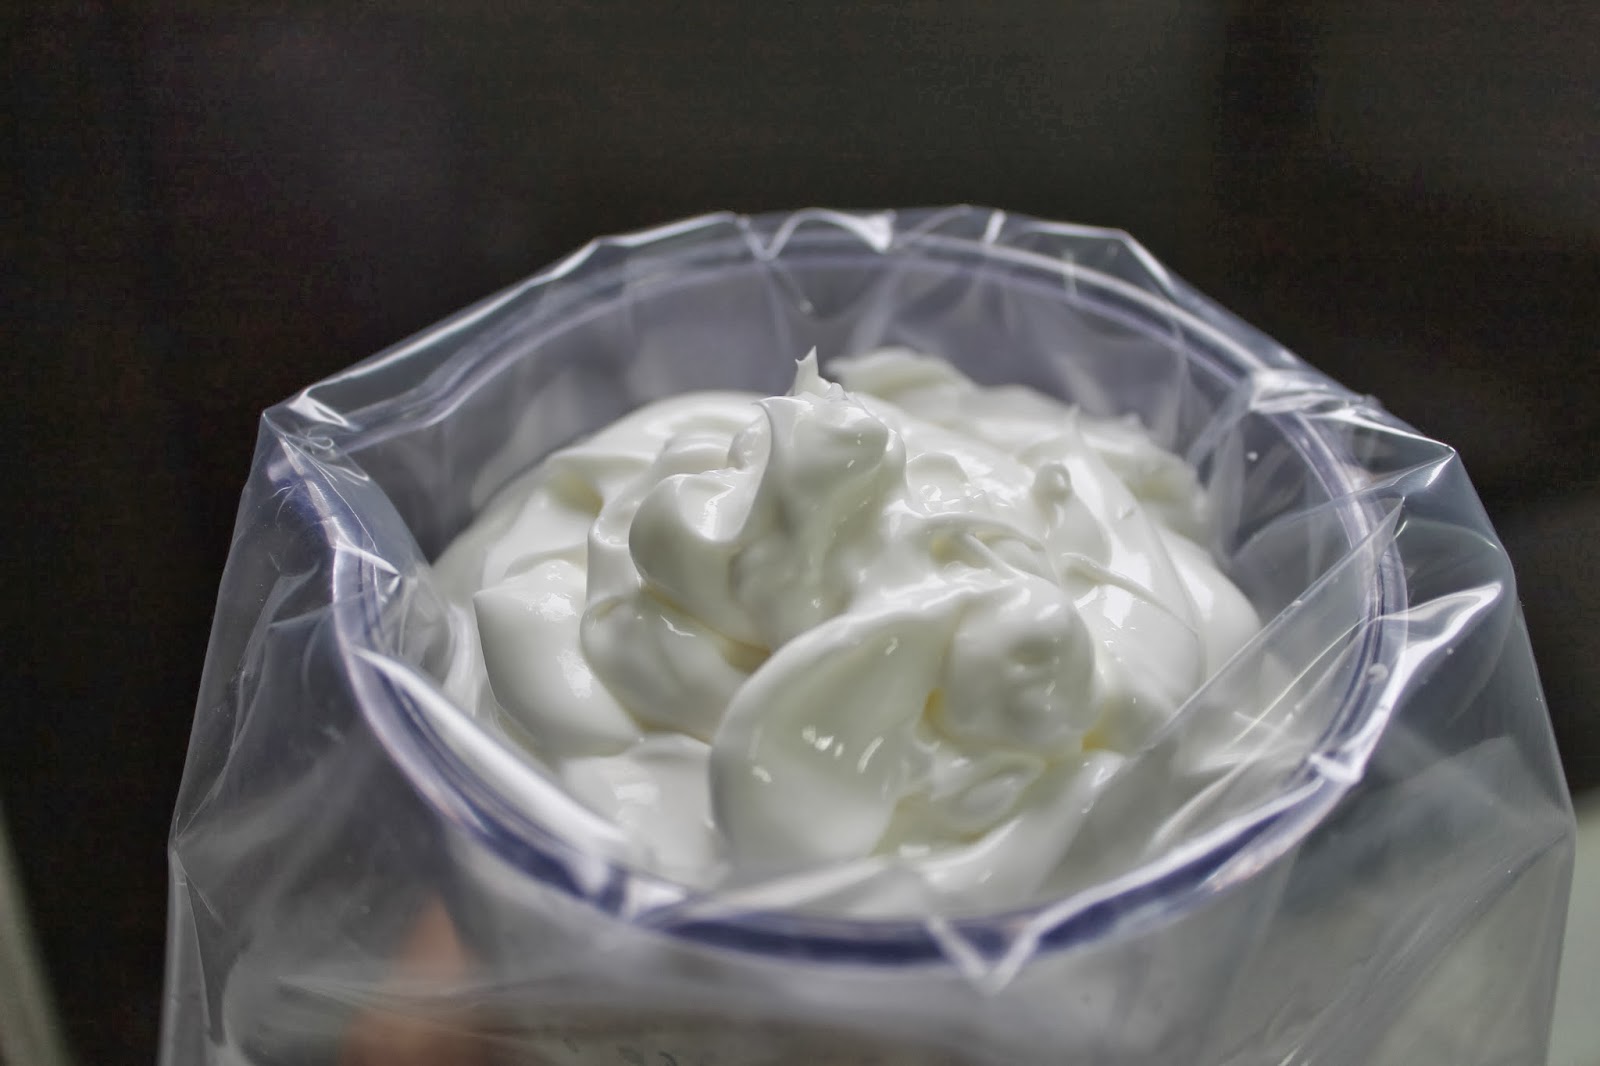
The stick blender is very helpful in speeding up trace.  It turns into a beautiful yellow cream.  This is when the fabric softener is added to give it a nice scent.


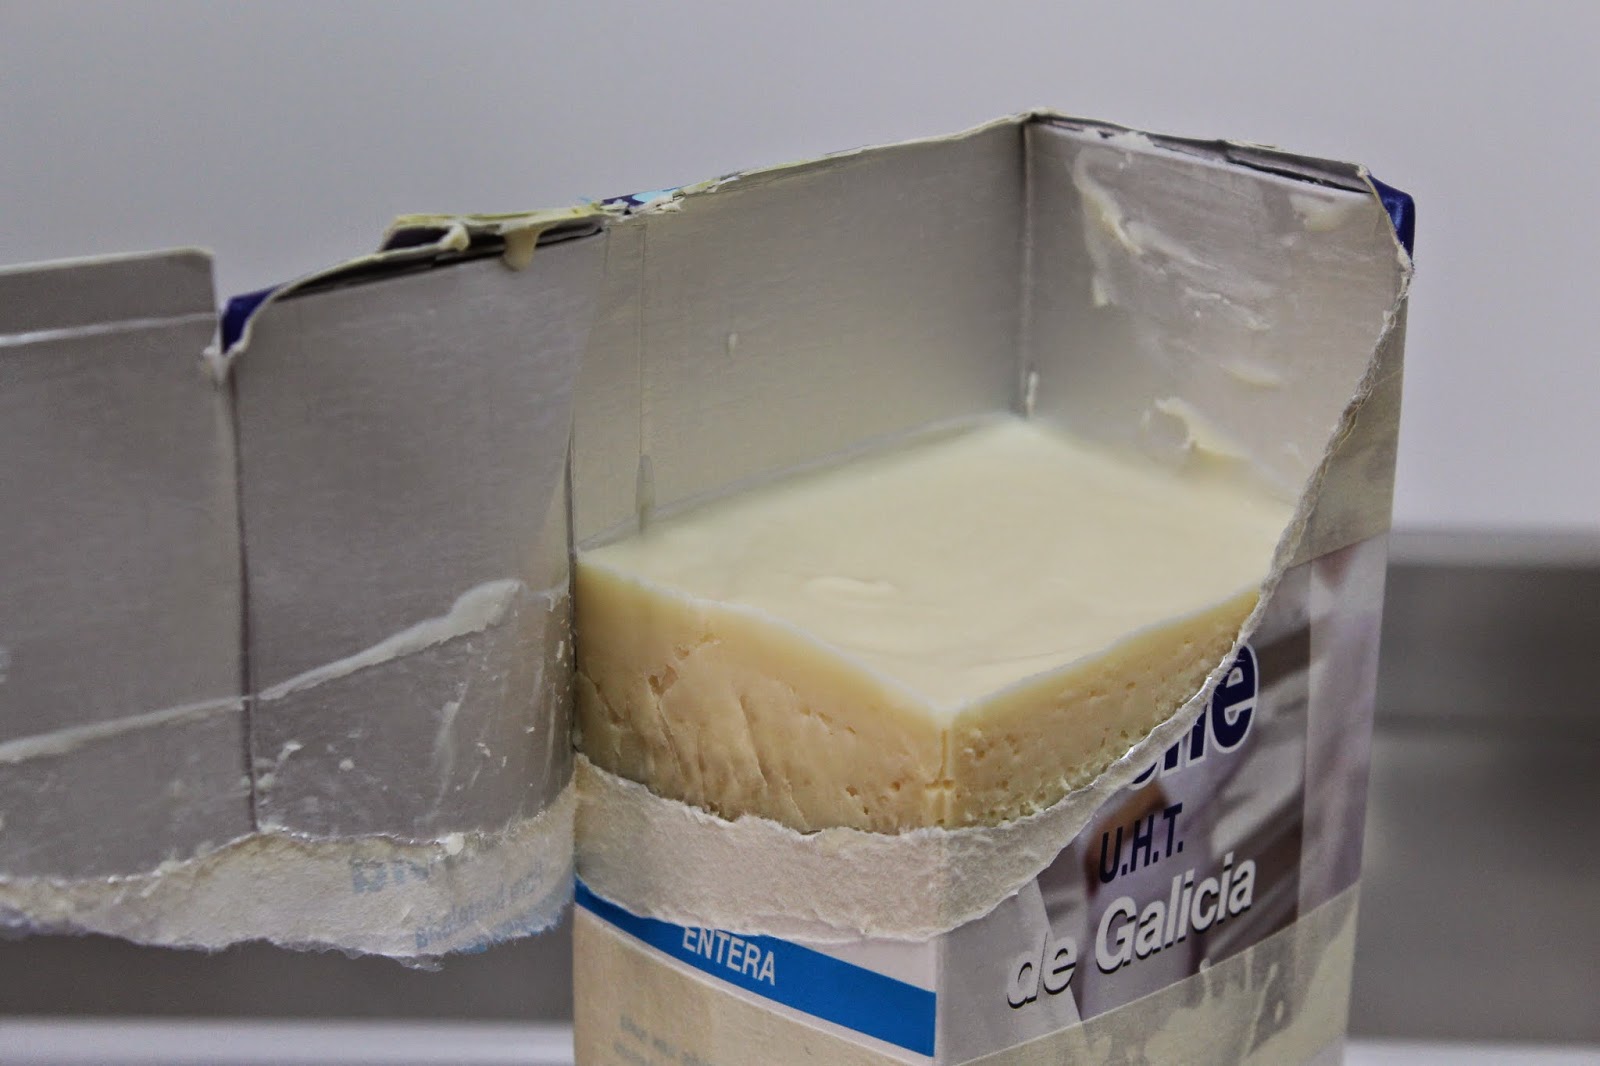
Once it reaches a thicker consistency much like vanilla pudding, pour the batter into the molds.  We used empty milk cartons which have been reinforced with some masking tape to give them more stability from bulging. The plastic ice-cream containers are another great option and they have lids for easier storage once the soap is cured.


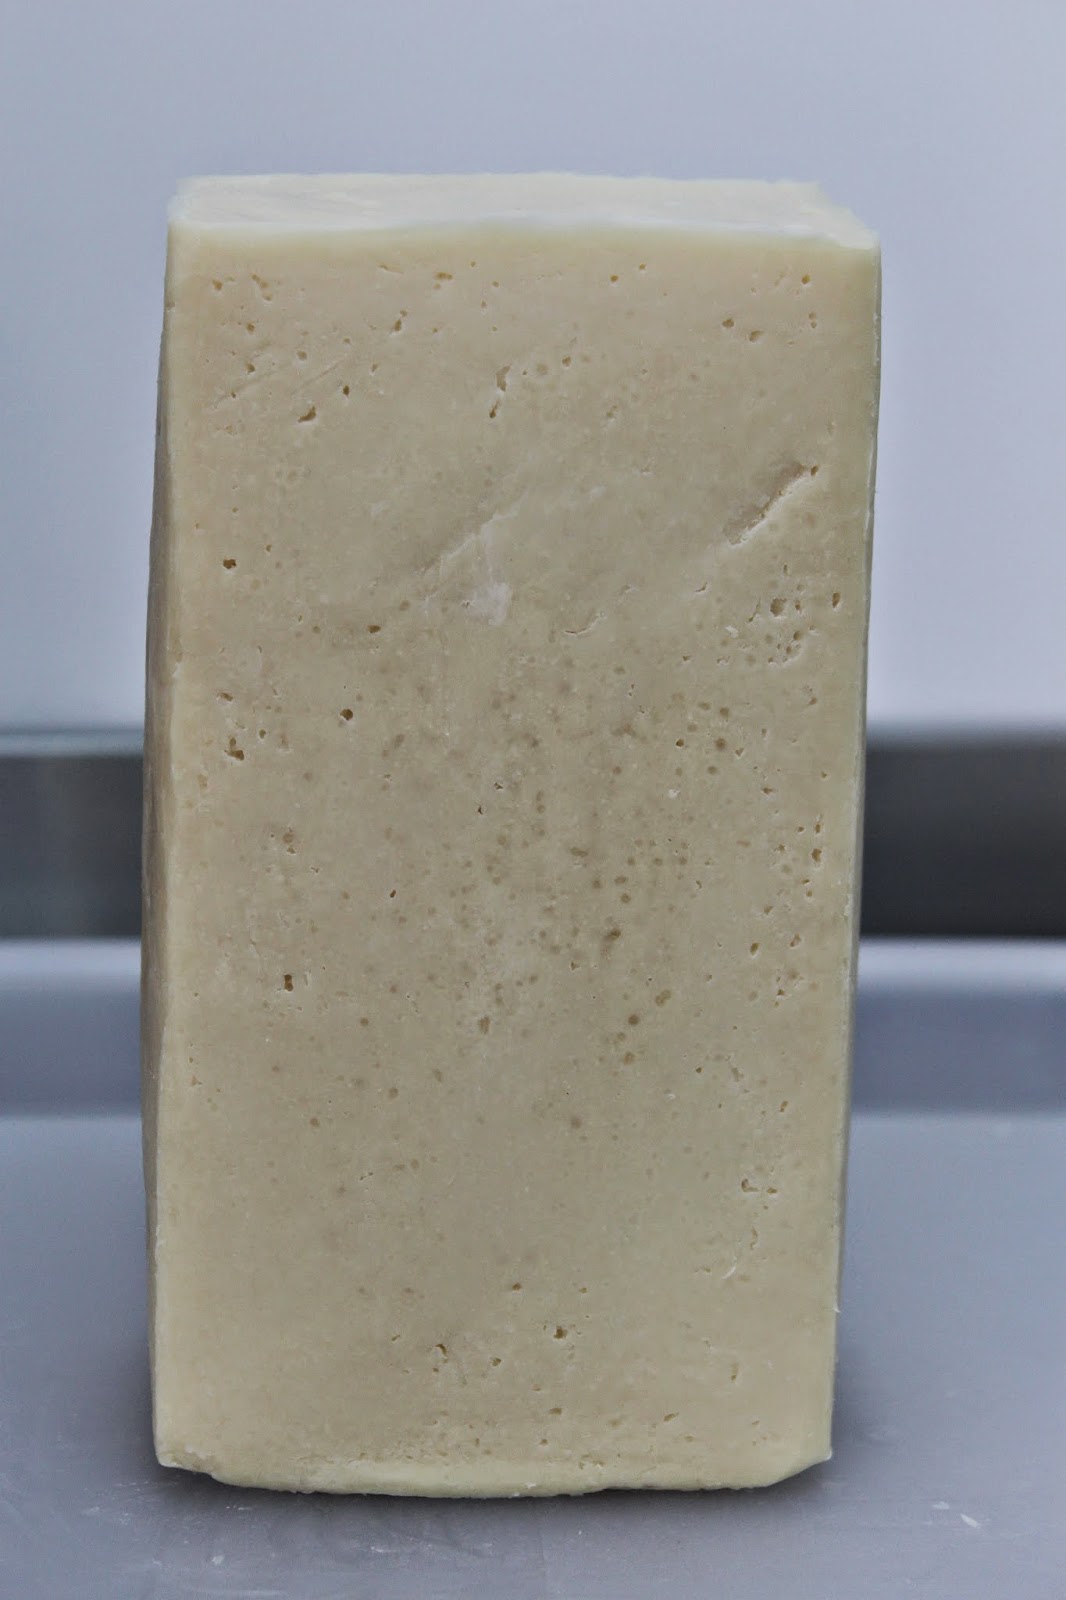
After 3 days, I unmolded one of the milk cartons. It is soft like semi-cured cheese and stuck to the carton; I was scraping and sticking the soap pieces back as I peeled off the carton.  It won´t be easy to remove the soap without deforming them, so the others will sit in their containers to cure.


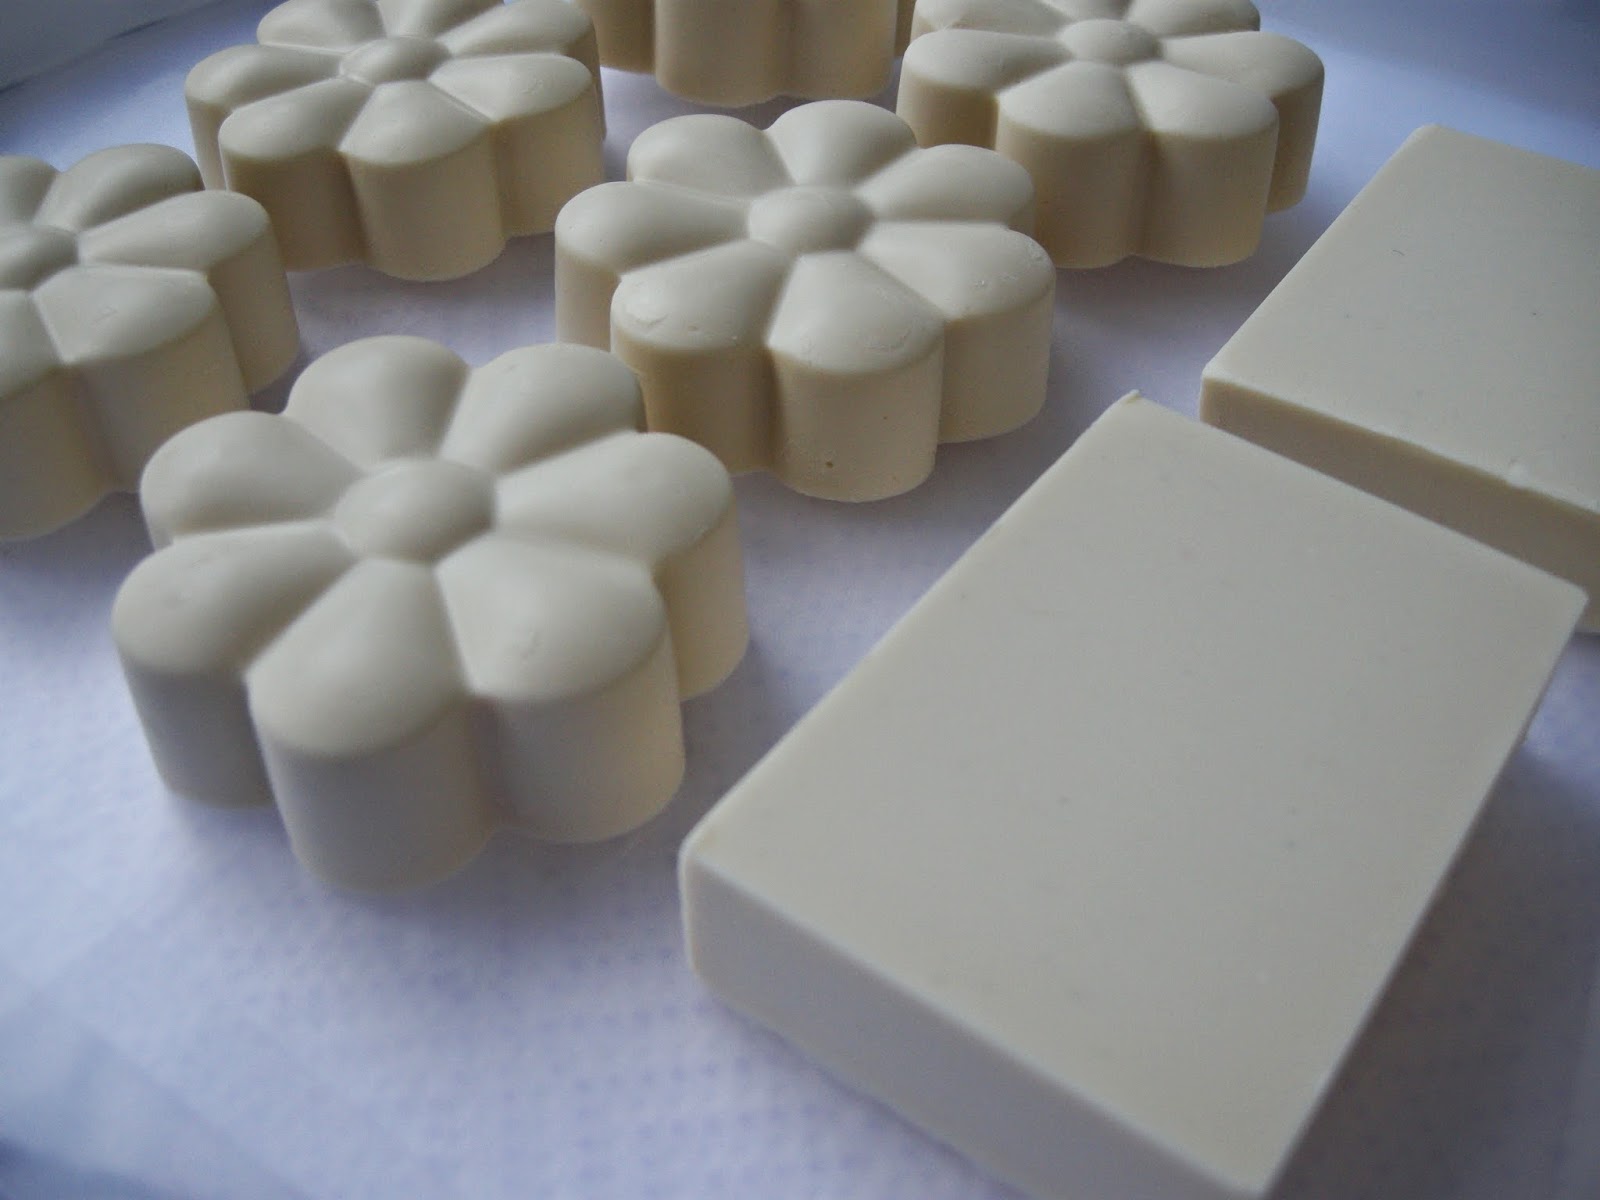
I am very happy at how they came out!  It lathers nicely, pH 7-8 and smells good and clean. The way a good soap ought to be.

Friday, December 13, 2013

Yureka! A Sugar Scrub That Turns Into Lotion!

My interest started when I saw an image of a fluffy sugar scrub that didn´t look like what I was using at all.

Mine didn´t hold together long enough to take a picture unless it´s on a spoon.  How could this be?  I started reading about it further and little by little, I learned about an emulsified sugar scrub.  I started here:
http://swiftcraftymonkey.blogspot.com.es/2013/01/facial-scrubs-emulsified-scrubs.html

I´ve been using an oil with sugar scrub for months and love how my skin feels afterwards.  It´s a different story for the sink and tub however; I´ve even slipped while trying to exfoliate my heal while standing (that was silly of me).  Well, that´s in the past now ever since I´ve started using this emulsified sugar scrub.  An important ingredient is an emulsifying wax (E-wax) which is commonly used in making lotions and creams in order to keep the oils and water from separating.  So imagine having the E-wax in the sugar scrub.  Once you start rubbing the sugar concoction onto wet skin, it creates lotion! Bye, bye to oily tub residue, and say hello to well hydrated skin without the need for lotion application after the shower.

The recipe I used is adapted from  http://www.soapalooza.com

620 grams olive oil
100 grams coconut oil
  50 grams shea butter
100 grams e-wax (Polawax)
  80 grams stearic acid
  50 grams beeswax
    2 kilos white sugar
  20 grams fragrance oil (honeydew melon)
  10 grams preservative (Sharomix)
 
Heat the oils, butter, both waxes and stearic acid on low until completely dissolved.

Pour into a heat-proof glass bowl with the sugar and stir well.  

Why the glass bowl?  It helps cool the batter and it´s easier to see if the mixing is thorough enough.
Once the bowl feels warm to the touch (below 50ºC), add the scent, skin-safe colorant (if using) and preservative.  I used a bit of green food coloring to match the honeydew melon fragrance oil. The final product is pourable at this point to get it into jars.  It will firm up some more so that if you tilt the jar, the dough will not budge but pliable enough to grab some to take with you to the shower.


Tuesday, December 10, 2013

Making Creamy Goat´s Milk Lotion


Wow! I was super excited seeing how this lotion came to be that I wanted to share my experience in making it.  It turned out better than I imagined; creamy and feels divine on the skin. 

I remember watching a video many months ago on the making of goat´s milk lotion but I wasn´t in my lotion phase at the time and left it at that since I was more into soaping.  Now that I have too much soap and am taking a breather, I started looking into lotions.  Today I came across the same video by Susie at
http://www.oursimplefarm.com

I watched the video twice to make sure I had it clear of what to do.  I had just about everything I needed so I used the lotion calculator  http://www.sbwave.com/lotion/  to come up with a comparable recipe to make 500 ml worth of lotion.

25 grams e-wax
20 grams stearic acid
35 grams sweet almond oil
25 grams shea butter
20 grams avocado oil
184 grams goat´s milk
184 grams bottled water (I didn´t have distilled water)
4 grams Sharomix preservative
5 grams rose fragrance oil
1 gram Vitamin E

I weighed out the oils, the stearic acid and e-wax into a heat-proof glass container;  the goat´s milk and water goes into another container.  My scale only has whole numbers for the grams so they are not as accurate as I would like.


Each glass container gets heated through in a hot water bath before combining their contents together.   I made sure all of the stearic acid and shea butter has melted.


Once it´s warm to the touch, I added the scent, preservative and Vitamin E oil.  


At first I hand mixed it and then used the stick blender to make sure everything stays emulsified and to also "fluff" the batter into the creamiest of creams.


A very straight forward recipe and the result is a sublime cream for face or body!

Update:
The lotion thickened up even further the following day, so the pump didn´t work as well.  It would be better in a cream jar or tub.  I like a thinner lotion; will make the next batch with more water or reduce the e-wax since I am partial to the pump bottles so I won´t risk contaminating the lotion.

Friday, July 26, 2013

Making Whipping Cream Beauty Soap Bars ( Cold Process )


The same video but on Youtube.
https://www.youtube.com/watch?v=McaiutbewYE

Update:  The lather test after almost a year later (July 2013 - May 2014). 


While uploading the photos, I must have clicked on something wrong and unknowingly deleted the Youtube video that was here.  I replaced it with a link and directly uploaded the video onto Blogger.

I didn´t really care for the strong aroma as a facial soap, hence, they sat wrapped up in my box for soaps.  When I realized I didn´t do a follow up on the lather test.  I took one into the shower and I just love it! It lathers great and gives a rich and creamy feel. For some reason the strong floral scent is pleasant in the shower since it wasn´t right there in my face but rather a subtle perfumed steam.

This recipe is a keeper.  I´ll just have to keep in mind the concentration of the EO or FO used.

Thursday, July 11, 2013

Making HP Goat´s Milk Honey Oatmeal Soap ( Hot Process )

The look is more rustic than with cold process soaps but there´s a satisfaction in using something homemade within days of making it.  This is a great project for a cool week-end because being around the crock pot in the Summer isn´t too appealing.  Much like baking, it leaves a wonderful smell and warmth in the home.

I realized (or is it realised?) that I misspelled "celsius" in the video and I´m blaming myself for using ºC too many times.


Wednesday, June 26, 2013

Making HP Cream Soap with Recipe ( Hot Process )

Making cream soap is quite interesting to me because you get to see the texture changes from combining the acids and oils with the lyes go through their stages in the process of converting into this creamy soap that looks good enough to eat.  I am including the recipe, the video of the process and the follow-up photos.  I hope someone out there finds it helpful.  I wished I had something like this when I was in search of information on cream soap without having to sign up or register in order to get access to tried recipes. So here is my tried recipe; it might not be up to par to some but it´s good enough for me and for anyone looking to start.


Day 8 of  "rotting"

Day 16 of  "rotting" (in container shot)
Day 16 of  "rotting"


Day 23 of "rotting"


Day 32 of "rotting"